Guest post by Paula Jakubik from Pixc
How To Optimize Your Product Photography For Your eCommerce Store
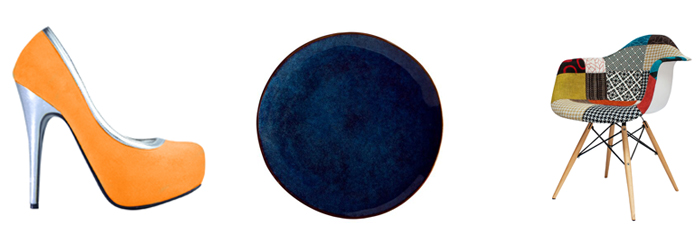
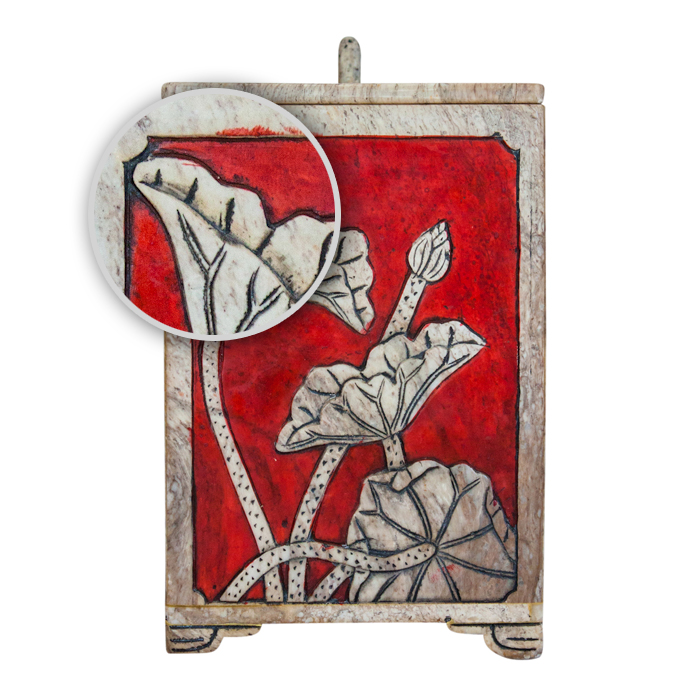
Tip 1: Choose the right hero image
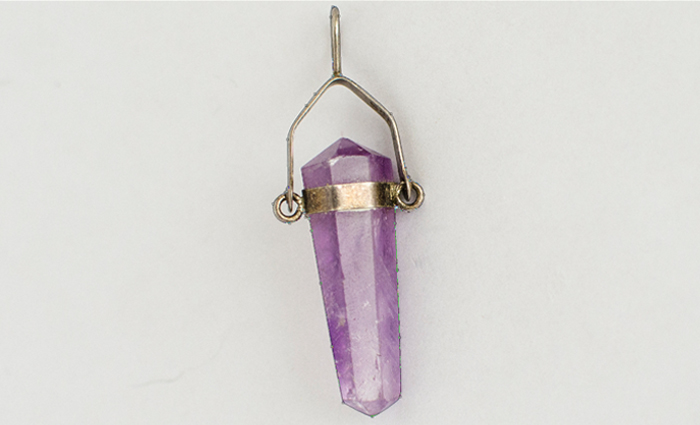
It’s true that a picture is worth a thousand words, but only if it’s the right picture. After you’ve taken your product images, you need to choose the one that best captures your product. This will usually be a front-on shot, but some products (like shoes) should have hero shots of the side, and others (like plates) should have hero shots from above. I’ve also found that chairs look awesome when shot from a 45 degree angle.
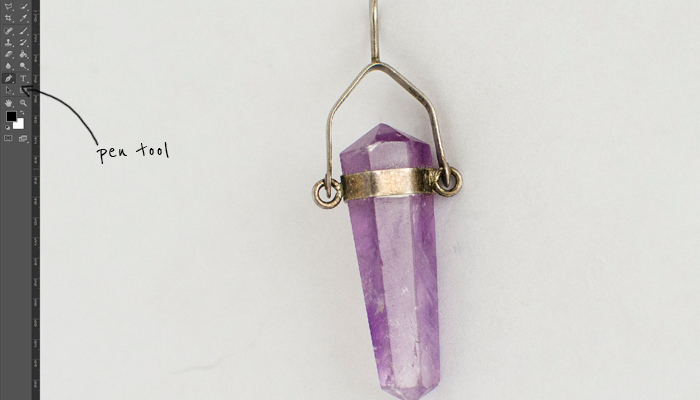
Tip 2: Remove the background
Take your product photography to the next level by placing your products on a plain, white background. It’s clean, it’s simple, it’s effective, and it will definitely give your online store a professional touch.
It’s a little fiddly but practice makes perfect, and if you get stuck there are loads of services online that’ll do this part for you. If you want to give it a go, open your image in Photoshop and follow these steps:
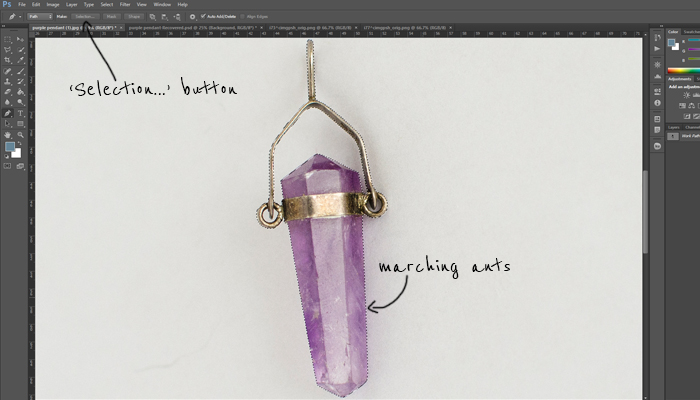
- Select the pen tool.
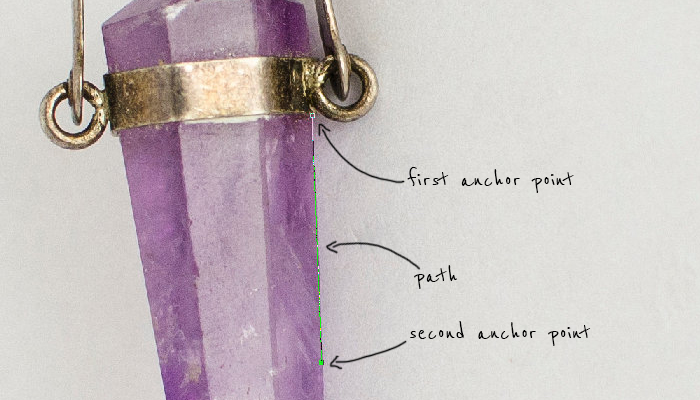
- Start by anywhere along the product’s edge. This will create an ‘anchor point’.
- Select another point along the products edge and another anchor point will appear, creating a ‘clipping path’. If you make a mistake, hit ‘command-z’ and you can undo it your action.
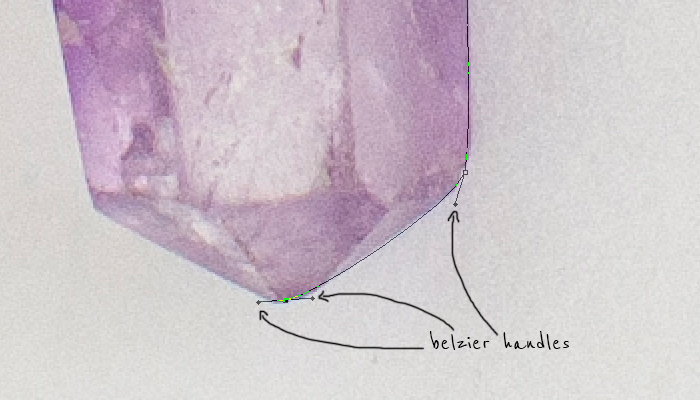
- When you hit a curved edge, you’ll need to play around with the curve of your path (which is, by default, straight). Click, hold and drag the mouse once you place your anchor point, and ‘belzier handles’ will appear. These let you change the shape of the path. The handles alter both sides of the anchor point but you can adjust them manually if you hold down the ‘alt’ key and drag that particular handle.
- Keep creating your path until your last anchor point catches up to the first. If any of your anchor points are a bit off, select the ‘Direct Selection Tool’ or hold down the ‘command’ key and drag the specific point you want to change.
- With the pen tool selected, click ‘Selection…’ at the top to save your path.. A dotted line (the ‘marching ants’) will appear where the path was.
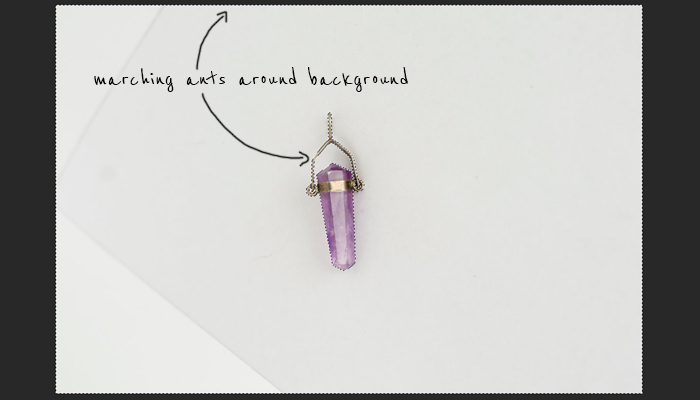
- At the top of your Photoshop window, go to ‘Select’ > ‘Inverse’ and the marching ants will be placed around the outer edge of the canvas. This has actually selected the background and not the product.
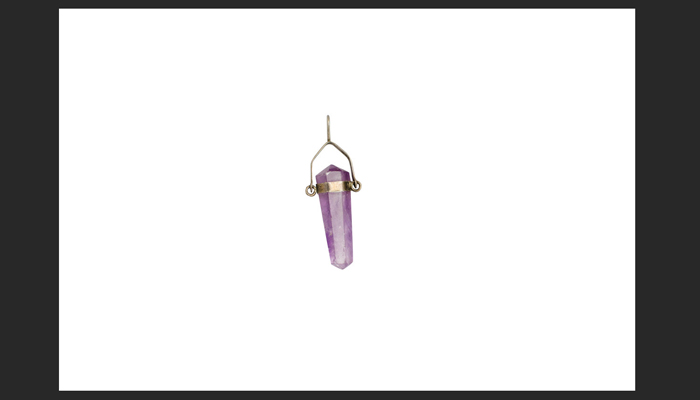
- Press ‘command-x’ on the keyboard and your background will be sitting on a clean, white background! Save your image as a JPEG and you’re done!


Tip 3: Make it BIG
When it comes to product photography, the bigger the better. Let’s back track a little – the image that you upload to your eCommerce store is the ‘base image’. This image is then re-sized by your website to fit the various templates you have on there, such as the one on your product listing page, the one on your shop page, and the alternative products thumbnails. When I say that your image should be BIG, I’m talking about the base image.
Ideally, you want your base images to be 1600px on the longest side. This size will optimize your images for mobile, and considering mobile commerce accounts for over 30% of eCommerce sales, it wouldn’t be wise to ignore this customer segment. This size is also large enough for an effective zoom function. The secret behind the zoom function is that it actually displays the base image, rather than ‘zooming’ in as you would not on a website. A zoom function needs to give the impression that the viewer is ‘zooming’ in, which can only happen if the base image is larger than the template.
If your website has been coded correctly, the base images will be automatically resized to the templates. If you have a square template, and square base image will be resized nicely. If you have a rectangular template, you may need a base image that’s in the same ratio as the template.
Tip 4: Create a template
The product should always be centered and take up the majority of the canvas. If you want your product images to look consistent, you’ll need to create a template that will allow you to easily resize your product images. I mean, there’s no point in having awesome product photos if they don’t look great together right?
The easiest way to do this is to create a template in some kind of a photo editing software. I recommend using Adobe Photoshop, but if you don’t have it, you can use anything like GIMP or Canva.
To create a template in Adobe Photoshop, start by creating a blank canvas with the dimensions you want. After that, you’ll need to identify the center point of the canvas. The best thing about using Photoshop to create the template is that you can easily create guidelines that’ll help you identify significant points on the canvas (just go to ‘View’ > ‘New Guide…’).
Create horizontal and vertical guidelines at 50%, and you’ll see these thin aqua lines form a cross on the canvas, which will disappear when you save the file. This will help you center the product. 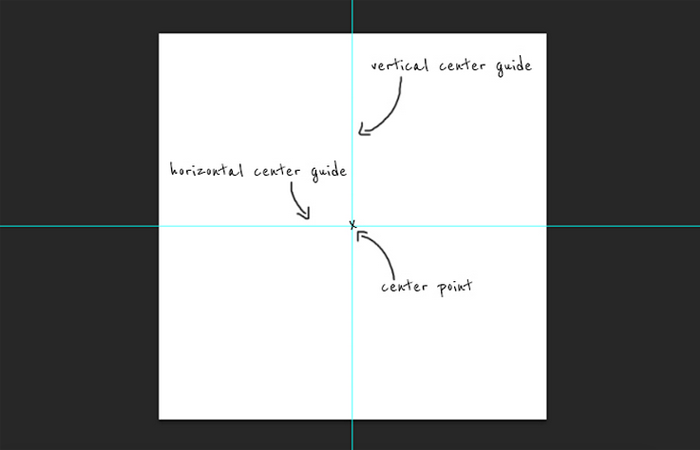
Next, you’ll want to create a border so that all your products take up the same amount of canvas space either vertically or horizontally, regardless of their shape or size.
This is what will give your site that consistent, professional look. The right amount of space around the product will depend on the padding around images (i.e. the blank space between your image frame and the other elements on the site pages) that you have on your website.
If you have a lot of padding, the product will need to take up the majority of the canvas to avoid an awkwardly spaced website. If you have a little padding, you’ll want the product to take up less of the canvas otherwise your website will look extremely cramped. I always start with 90%, and then move up or down by 5% until I get the result I want – I recommend testing 1-2 of these on your site to see how it all looks together.
To apply product images to your template, you need to copy & paste the product into the template file, then resize the product until it’s centred and the product is just touching guidelines on two opposite sides, like in the screenshot below.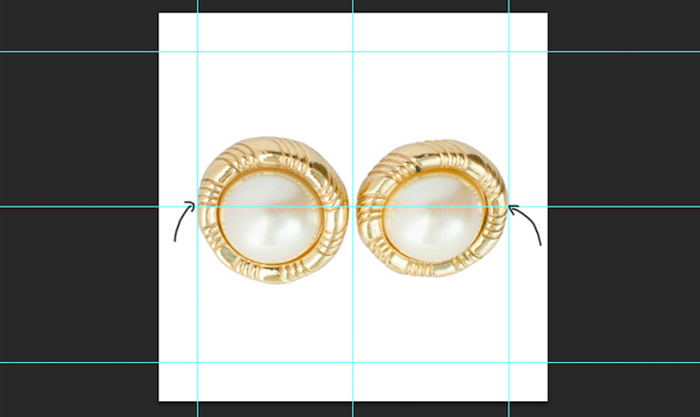
Save this as a new file.
You should also save your template so that you don’t need to create a new one every time you need product images.
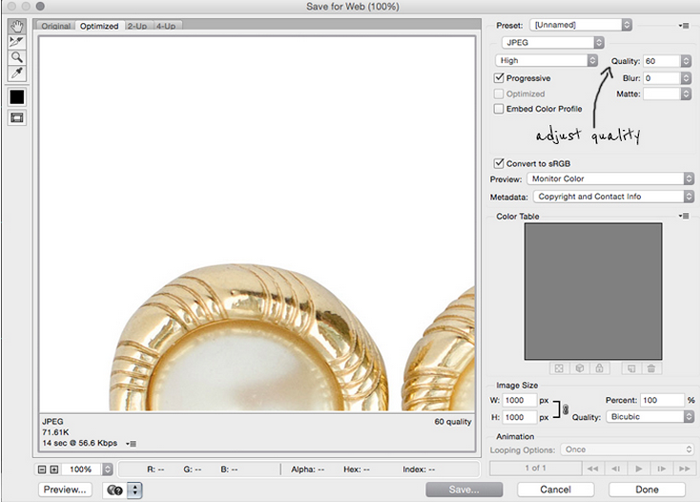
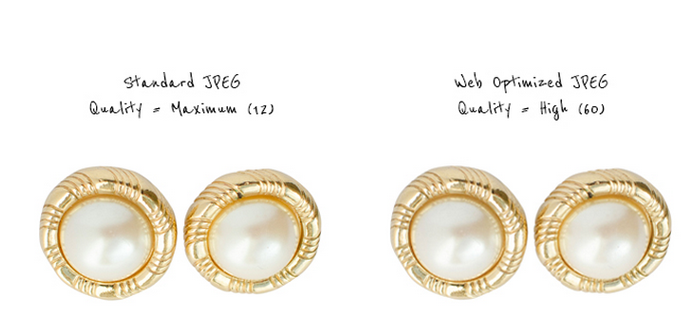
Tip 5: Save for Web
The biggest problem with high-quality product images that are large in terms of image size (i.e. height x width) is that they’re usually also large in terms of file size (KB, MB, GB etc.). If you have a lot of products and images on your site, having so many images is likely to slow your site down, and online shoppers don’t like to be kept waiting. In fact, 40% of people abandon a website that takes more than 3 seconds to load.
A cool trick in Photoshop is the ability to save web versions of your files. Just go to ‘File’ > ‘Save for Web…’ and choose your quality setting. I’ve found that you can go as low as 60 and the quality difference is barely noticeable, the image size is still large, but the file size is significantly reduced.
Takeaway
If you missed part 1 of this post you can take a look at it here. Product photography is one of the only ways a visitor can interact with your product without it actually being present so you’ve got to make sure it is extremely good. With these tips you are now equipped to take some of your own amazing product photos.
Guest post by Paula Jakubik from Pixc
About the author: Paula is the Community Manager at Pixc. You’ll often find her in the corner of a cafe in Sydney, blogging about eCommerce and helping online store owners with their product images.